昨年末にVisio Onlineの機能をJavaScriptで拡張する方法について記事を書きました。
「Office Dev Center – Visio JavaScript APIs Preview」によると、ついに新しいVisio JavaScript APIsが使えるようになったみたいなので、さっそく試してみました。
※ 下記手順はOffice 365 Enterprise E3環境で確認を行っています。
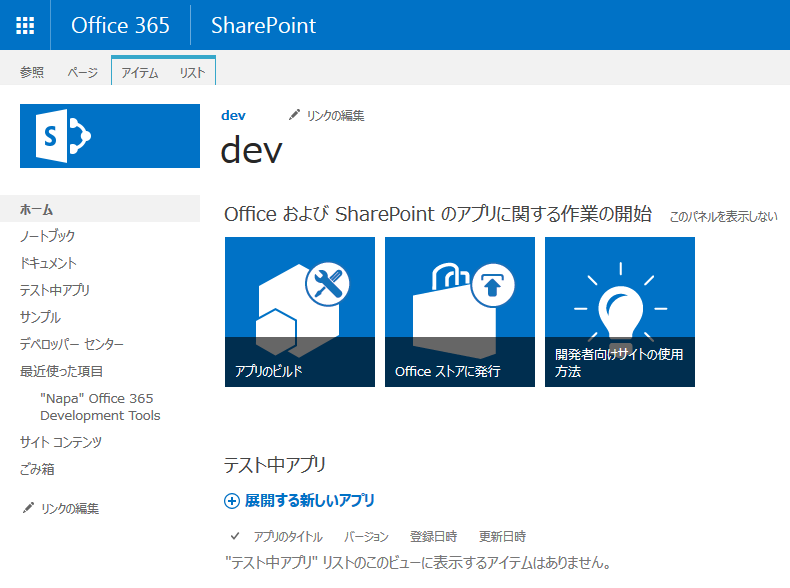
- Office 365の開発者向けサイトを開きます。
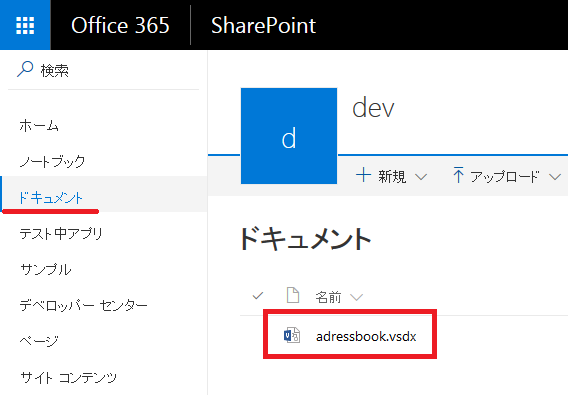
- 「ドキュメント」にvsdxファイルをアップロードします。
- Visio Onlineでアップロードしたvsdxファイルを開き、URL(https://*****.sharepoint.com/sites/dev/_layouts/15/WopiFrame.aspx?sourcedoc={********-****-****-****-************}&action=interactivepreview)をコピーしておきます。
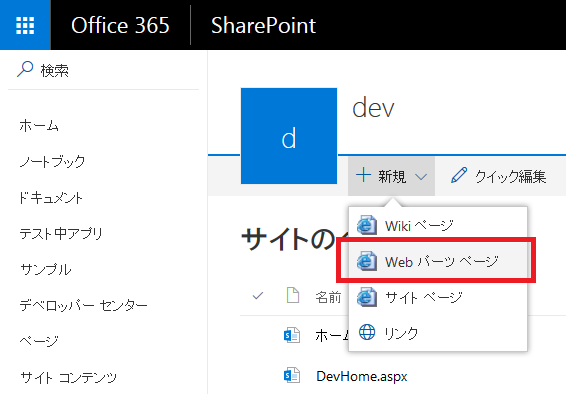
- 「サイト コンテンツ」から「サイトのページ」を開きます。
- 「新規」から「Web パーツ ページ」を選択します。
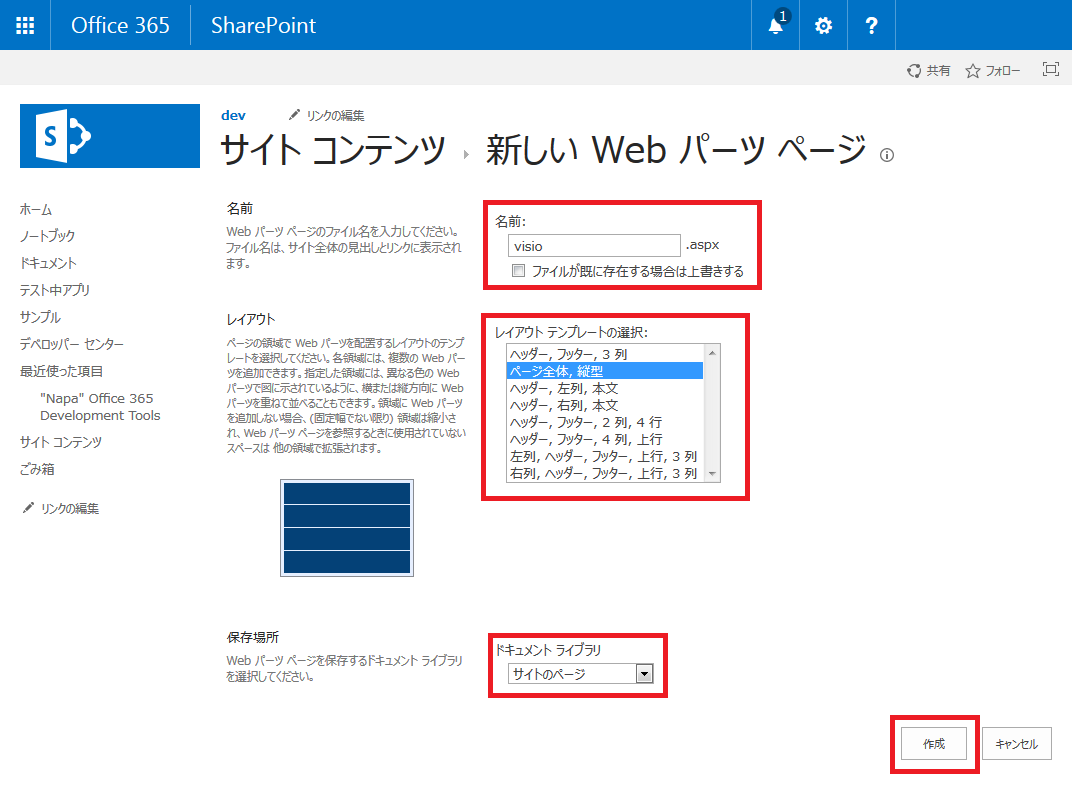
- 「新しい Web パーツ ページ」画面が表示されたら、名前、レイアウト、保存場所を選択し、「作成」ボタンをクリックします。(私は「ページ全体, 縦型」レイアウトを選択しました。)
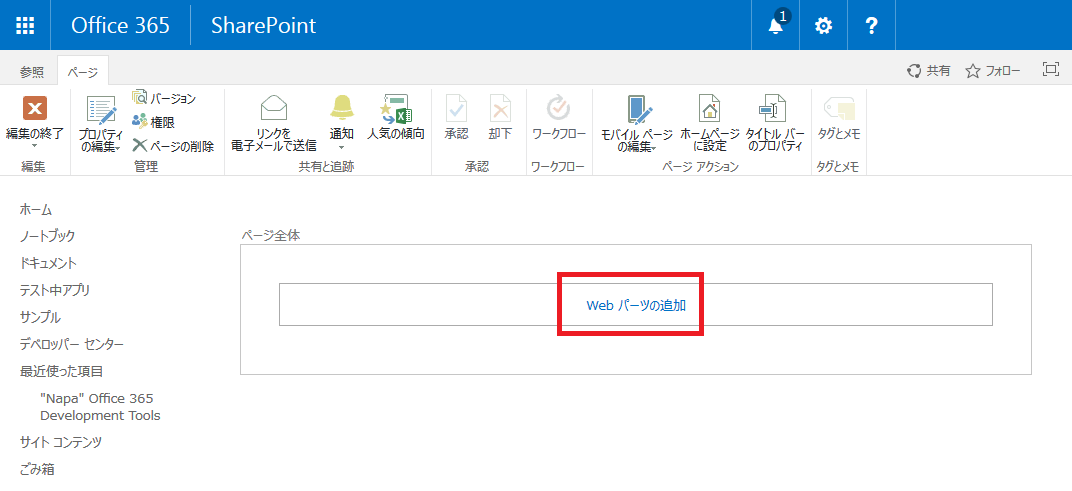
- ページの編集画面が表示されたら「Web パーツの追加」を選択します。
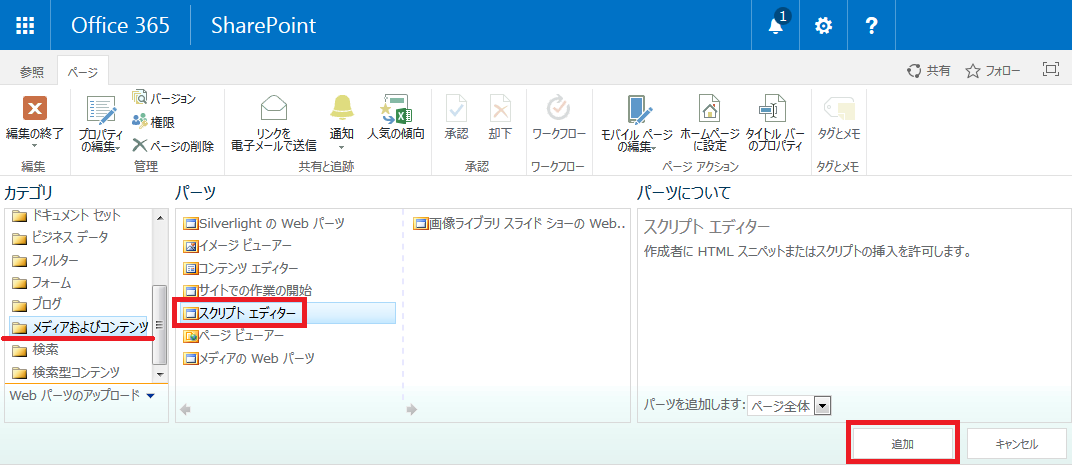
- 「メディアおよびコンテンツ」から「スクリプト エディター」を選択し、「追加」ボタンをクリックします。
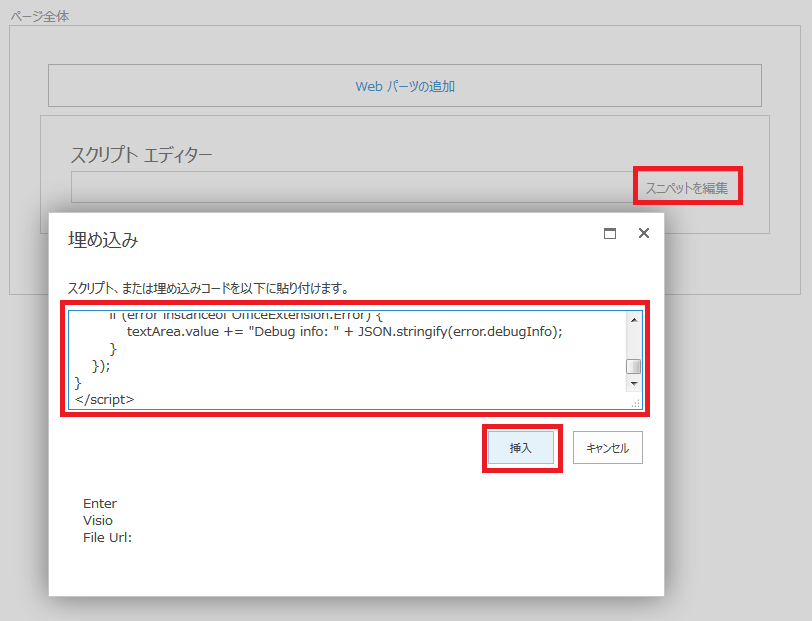
- 「スニペットを編集」から下記コードを貼り付け、「挿入」ボタンをクリックします。
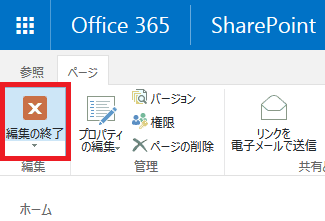
- 「編集の終了」ボタンをクリックして、ページの編集を終了します。
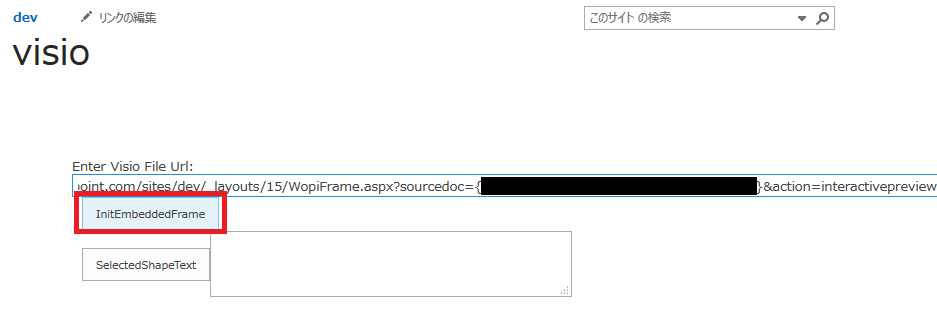
- 「Enter Visio File Url」ボックスに手順3.でコピーしたvsdxファイルのURLを貼り付け、「InitEmbeddedFrame」ボタンをクリックします。
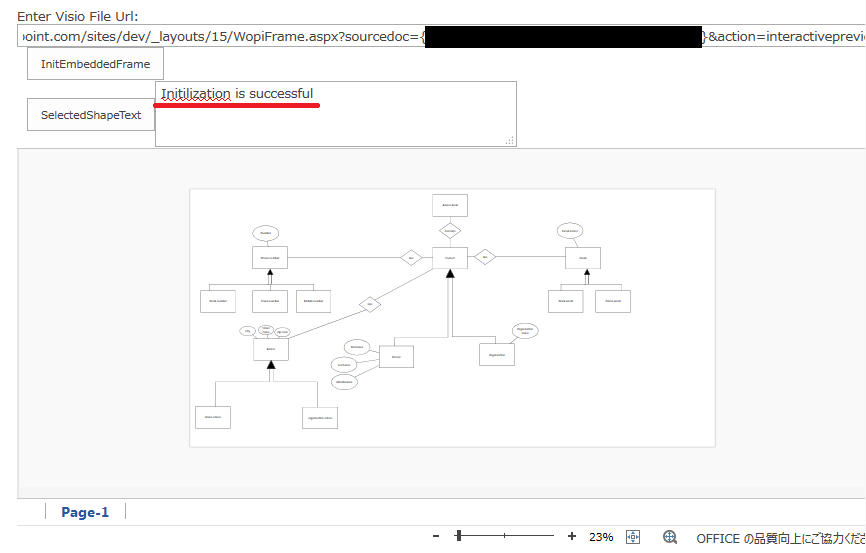
- 「Initilization is successful」とのメッセージが表示されたら読み込み成功です。
- 埋め込まれたVisioのフレーム上でシェイプを選択し、「SelectedShapeText」ボタンをクリックすると、テキストエリアにシェイプの文字列が表示されます。

<script src='https://visioonlineapi.azurewebsites.net/visio.js' type='text/javascript'></script>

Enter Visio File Url:<br/>
<script language="javascript">
document.write("<input type='text' id='fileUrl' size='120'/>");
document.write("<input type='button' value='InitEmbeddedFrame' onclick='initEmbeddedFrame()' />");
document.write("<br />");
document.write("<input type='button' value='SelectedShapeText' onclick='getSelectedShapeText()' />");
document.write("<textarea id='ResultOutput' style='width:350px;height:60px'> </textarea>");
document.write("<div id='iframeHost' />");

var textArea;
// Loads the Visio application and Initializes communication between devloper frame and Visio online frame
function initEmbeddedFrame() {
        textArea = document.getElementById('ResultOutput');
    var url = document.getElementById('fileUrl').value;
    if (!url) {
        window.alert("File URL should not be empty");
    }
    // APIs are enabled for EmbedView action only.
    url = url.replace("action=view","action=embedview");
    url = url.replace("action=interactivepreview","action=embedview");

       var session = new OfficeExtension.EmbeddedSession(url, { id: "embed-iframe",container: document.getElementById("iframeHost") });
       return session.init().then(function () {
        // Initilization is successful
        textArea.value  = "Initilization is successful";
        OfficeExtension.ClientRequestContext._overrideSession = session;
    });
     }

// Code for getting selected Shape Text using the shapes collection object
function getSelectedShapeText() {
    Visio.run(function (ctx) {
       var page = ctx.document.getActivePage();
       var shapes = page.shapes;
       shapes.load();
           return ctx.sync().then(function () {
               textArea.value = "Please select a Shape in the Diagram";
               for(var i=0; i<shapes.items.length;i++)
            {
              var shape = shapes.items[i];
                  if ( shape.select == true)
               {
                textArea.value = shape.text;
                    return;
                   }
            }
      });
     }).catch(function(error) {
        textArea.value = "Error: ";
        if (error instanceof OfficeExtension.Error) {
            textArea.value += "Debug info: " + JSON.stringify(error.debugInfo);
        }
    });
}
</script>
Visio JavaScript APIs reference より

以上の手順で、Visio JavaScript APIsの動作確認をすることができました。
2017/2/13 追記:
ウィンドウのズームやシェイプの列挙、ハイパーリンク情報の取得するコードを書いてみました。


この記事へのコメントはありません。