Office Scripts

[Office Scripts]日付印を作成する方法

下記記事「Office スクリプトとPower Automateで作る見積書発行ワークフロー」をご覧になった方から、「日付印の日付部分を変更するにはどうすれば良いか?」とのご質問をいただきました。

上記記事では事前に印鑑の画像を準備しておき(日付印ではなく氏名印)、Power AutomateとOffice スクリプトによってExcelシート上に作成した画像を挿入する処理を行っています。

日付印の場合だと「クリックスタンパー」等のツールやサービスで画像を作成した時点で日付が固定化されてしまうわけですが、これを処理日に合わせて変更したい、というわけですね。

対応策としてはいくつか考えられます。

  1. 何らかの方法で動的に印鑑画像を作成する。
  2. 日付部分以外の印鑑画像を作成しておき、動的に作成したテキストボックスを画像に重ね合わせる。
  3. 印鑑を画像では無く、Excelの図形機能を使って表現する。

使い勝手の良いAPIがあれば1.の方法が簡単ですが、Office スクリプトのみで処理することを考えると3.の方法が現実的だと思います。
Office スクリプトには図形をシートに挿入するための(Worksheet).addGeometricShapeメソッドが用意されており、技術的には難しくなさそうだったので早速試してみました。

日付印を作成するOffice スクリプト
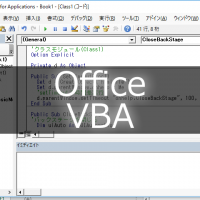
作成したスクリプトが下記になります。
やっていることは非常にシンプルで、(Worksheet).addGeometricShapeメソッドや(Worksheet).addLineメソッドで円や線、矩形といった図形を追加し、大きさや色、フォント等を調整しているだけです。
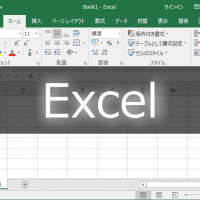
//日付印作成
function main(workbook: ExcelScript.Workbook) {
/* フォント, テキスト, 線色・文字色指定 */
const fontName = "MS P明朝"; //フォント
const fontSize = 9; //文字サイズ
const objectColor = "FF0000"; //線色・文字色
const txtTop = "検"; //上段テキスト
const dt: Date = new Date;
const txtCenter = "'" + dt.getFullYear().toString().slice(-2) + ". " + (dt.getMonth() + 1) + ". " + dt.getDate(); //中段テキスト
const txtBottom = "きぬあさ"; //下段テキスト
const sheet = workbook.getActiveWorksheet();
//円
const shpEllipse = sheet.addGeometricShape(ExcelScript.GeometricShapeType.ellipse);
shpEllipse.setName("円");
shpEllipse.setHeight(51.75);
shpEllipse.setWidth(51.75);
shpEllipse.setTop(14.75);
shpEllipse.setLeft(125.75);
shpEllipse.getFill().setTransparency(1);
shpEllipse.getLineFormat().setColor(objectColor);
shpEllipse.getLineFormat().setWeight(2);
shpEllipse.getLineFormat().setDashStyle(ExcelScript.ShapeLineDashStyle.solid);
//上線
const shpLineTop = sheet.addLine(127.75, 32, 175.5, 32, ExcelScript.ConnectorType.straight);
shpLineTop.setName("上線");
shpLineTop.getLineFormat().setColor(objectColor);
shpLineTop.getLineFormat().setWeight(1);
shpLineTop.getLineFormat().setDashStyle(ExcelScript.ShapeLineDashStyle.solid);
//下線
const shpLineBottom = sheet.addLine(127.75, 49.25, 175.5, 49.25, ExcelScript.ConnectorType.straight);
shpLineBottom.setName("下線");
shpLineBottom.getLineFormat().setColor(objectColor);
shpLineBottom.getLineFormat().setWeight(1);
shpLineBottom.getLineFormat().setDashStyle(ExcelScript.ShapeLineDashStyle.solid);
//上段テキスト
const shpTextTop = sheet.addGeometricShape(ExcelScript.GeometricShapeType.rectangle);
shpTextTop.setName("上段テキスト");
shpTextTop.setHeight(12);
shpTextTop.setWidth(50);
shpTextTop.setTop(18.5);
shpTextTop.setLeft(126.75);
shpTextTop.getFill().setTransparency(1);
shpTextTop.getLineFormat().setTransparency(1);
shpTextTop.getTextFrame().setVerticalAlignment(ExcelScript.ShapeTextVerticalAlignment.middle);
shpTextTop.getTextFrame().setHorizontalAlignment(ExcelScript.ShapeTextHorizontalAlignment.center);
const trngTextTop = shpTextTop.getTextFrame().getTextRange();
trngTextTop.getFont().setColor(objectColor);
trngTextTop.getFont().setName(fontName);
trngTextTop.getFont().setSize(fontSize);
trngTextTop.setText(txtTop);
//中段テキスト
const shpTextCenter = sheet.addGeometricShape(ExcelScript.GeometricShapeType.rectangle);
shpTextCenter.setName("中段テキスト");
shpTextCenter.setHeight(12);
shpTextCenter.setWidth(52);
shpTextCenter.setTop(34.1250393700787);
shpTextCenter.setLeft(125.75);
shpTextCenter.getFill().setTransparency(1);
shpTextCenter.getLineFormat().setTransparency(1);
shpTextCenter.getTextFrame().setVerticalAlignment(ExcelScript.ShapeTextVerticalAlignment.middle);
shpTextCenter.getTextFrame().setHorizontalAlignment(ExcelScript.ShapeTextHorizontalAlignment.center);
const trngTextCenter = shpTextCenter.getTextFrame().getTextRange();
trngTextCenter.getFont().setColor(objectColor);
trngTextCenter.getFont().setName(fontName);
trngTextCenter.getFont().setSize(fontSize);
trngTextCenter.setText(txtCenter);
//下段テキスト
const shpTextBottom = sheet.addGeometricShape(ExcelScript.GeometricShapeType.rectangle);
shpTextBottom.setName("下段テキスト");
shpTextBottom.setHeight(12);
shpTextBottom.setWidth(50);
shpTextBottom.setTop(50);
shpTextBottom.setLeft(126.75);
shpTextBottom.getFill().setTransparency(1);
shpTextBottom.getLineFormat().setTransparency(1);
shpTextBottom.getTextFrame().setVerticalAlignment(ExcelScript.ShapeTextVerticalAlignment.middle);
shpTextBottom.getTextFrame().setHorizontalAlignment(ExcelScript.ShapeTextHorizontalAlignment.center);
const trngTextBottom = shpTextBottom.getTextFrame().getTextRange();
trngTextBottom.getFont().setColor(objectColor);
trngTextBottom.getFont().setName(fontName);
trngTextBottom.getFont().setSize(fontSize);
trngTextBottom.setText(txtBottom);
//グループ化
const shpStamp = sheet.addGroup([shpEllipse, shpLineTop, shpLineBottom, shpTextTop, shpTextCenter, shpTextBottom]);
shpStamp.setName("日付印");
//指定したセルに移動
const rng = sheet.getRange("B2");
shpStamp.setTop(rng.getTop());
shpStamp.setLeft(rng.getLeft());
}

実行画面

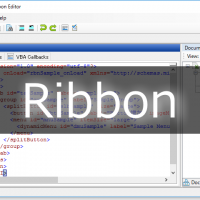
今回紹介したコードでは単に図形をシートに追加しているだけですが、下記のように(Shape).getImageAsBase64メソッドで画像化&Base64エンコードした文字列を取得することもできるので、Power Automateと組み合わせれば、動的に作成した透過PNGを使用した処理を行ったり、幅広く応用できそうです。

1
2
const b64 = shpStamp.getImageAsBase64(ExcelScript.PictureFormat.png);
console.log(b64);

また、印鑑用図形の作成にあたっては、NOMBO氏が開発された「Excel電子印鑑」で作成した図形を参考にさせていただきました。この場を借りてお礼申し上げます。

関連記事

[Power Automate for desktop]曜日に応じて処理を実行する方法前のページ

[Power Automate for desktop]VSTOアドイン内のコードを実行する方法次のページ

関連記事

  1. Office Scripts

    [Office Scripts]外部APIを呼び出す方法

    下記サイトにあるように、Office Scriptsでは外部ライブラリ…

  2. Office Scripts

    Visual Studio Code for Office Scriptsの紹介

    インストール要らずで利用できるWeb用Visual Studio Co…

  3. Office Scripts

    [Office Scripts]スクリプト ボタンの紹介

    お久しぶりのOffice スクリプトの記事です。昨年の11月にボタ…

  4. Office Scripts

    Project Oakdaleのテーブルに5000件のデータをインポートしてみました。

    前回の記事の続きです。前回、Power Automateを使っ…

  5. Office Scripts

    [Office Scripts]Power Automateからスクリプトを実行する

    下記Webサイトにある通り、Office Scriptsのスクリプトは…

コメント

  • コメント (0)

  • トラックバックは利用できません。

  1. この記事へのコメントはありません。

Time limit is exhausted. Please reload CAPTCHA.

※本ページはプロモーションが含まれています。

Translate

zh-CNzh-TWenfrdejakorues

最近の記事

アーカイブ

PAGE TOP