前回の記事でExcelの新たな機能「Custom functions」を紹介しました。
SUMやAVERAGEといったワークシート関数と同じように呼び出すことができ、非常に便利なのですが、一点だけ困ったことがあります。
それは、“デバッグしづらい”ことです。
Visual Studioを使わずにOffice アドインを開発する場合、一般的なOffice アドインであれば、F12開発者ツールを使って簡単にデバッグできるのですが、Custom functionsの場合は画面が表に出てこないため、F12開発者ツールを使うことができません。
そこで出番となるのが「Vorlon.JS」です。
Vorlon.JSとは?
Vorlon.JSとは、“Web上で使える開発者ツール”のようなもので、下記ページに詳しい説明が記載されています。
- Vorlon.jsとは? ブラウザーでWebデバッグできるお手軽な開発者ツール – Build Insider
- http://www.buildinsider.net/web/vorlon/01
- Vorlon.JS・多数のブラウザをまとめてデバッグできるリモートデバッガー MOONGIFT
- http://www.moongift.jp/2015/05/vorlon-js-
- vorlon.jsを使って端末のリモートデバッグしてみる – Qiita
- https://qiita.com/igara/items/d81edf07a4f138cfba68
Vorlon.JSのインストール
Vorlon.JSはnpmで簡単にインストールすることができます。
npm i -g vorlon
npm(Node.js)のインストールについては下記記事をご参照ください。

Vorlon.JSの設定
Vorlon.JSのインストール後は設定を行います。
今回はSSLを有効にする必要があるので、設定ファイル(config.json)を開き、「useSSL」の値を「true」にします。
{
    "baseURL": "",
    "useSSLAzure": false,
    "useSSL": true,
    "SSLkey": "cert/server.key",
    "SSLcert": "cert/server.crt",
    "activateAuth": false,
    "username": "",
    "password": "",
    "host": "0.0.0.0",
    "port": 1337,
    "socket": "",
    "enableWebproxy": true,
    "baseProxyURL": "",
    "proxyHost": "0.0.0.0",
    "proxyPort": 5050,
    "proxyEnvPort": false,
    "vorlonServerURL": "",
    "vorlonProxyURL": "",
    "plugins": [
        {
            "id": "DOM",
            "name": "Dom Explorer",
            "panel": "top",
            "foldername": "domExplorer",
            "enabled": true
        },
        {
            "id": "OBJEXPLORER",
            "name": "Obj. Explorer",
            "panel": "top",
            "foldername": "objectExplorer",
            "enabled": true,
            "nodeCompliant": true
        },
        {
            "id": "XHRPANEL",
            "name": "XHR",
            "panel": "top",
            "foldername": "xhrPanel",
            "enabled": true,
            "nodeCompliant": true
        },
        {
            "id": "WEBSTANDARDS",
            "name": "Best practices",
            "panel": "top",
            "foldername": "webstandards",
            "enabled": true
        },
        {
            "id": "NETWORK",
            "name": "Network Monitor",
            "panel": "top",
            "foldername": "networkMonitor",
            "enabled": true
        },
        {
            "id": "RESOURCES",
            "name": "Resources Explorer",
            "panel": "top",
            "foldername": "resourcesExplorer",
            "enabled": true
        },
        {
            "id": "UNITTEST",
            "name": "Unit Test",
            "panel": "top",
            "foldername": "unitTestRunner",
            "enabled": true
        },
        {
            "id": "DEVICE",
            "name": "My Device",
            "panel": "top",
            "foldername": "device",
            "enabled": true
        },
        {
            "id": "NODEJS",
            "name": "NodeJS",
            "panel": "top",
            "foldername": "nodejs",
            "enabled": true,
            "nodeCompliant": true,
            "nodeOnly": true
        },
        {
            "id": "BOTFRAMEWORKINSPECTOR",
            "name": "Bot Framework Inspector",
            "panel": "top",
            "foldername": "botFrameworkInspector",
            "enabled": true,
            "nodeCompliant": true,
            "nodeOnly": true
        },
        {
            "id": "EXPRESS",
            "name": "Express",
            "panel": "top",
            "foldername": "express",
            "enabled": false,
            "nodeCompliant": true,
            "nodeOnly": true
        },
        {
            "id": "BABYLONINSPECTOR",
            "name": "Babylon Inspector",
            "panel": "top",
            "foldername": "babylonInspector",
            "enabled": false
        },
        {
            "id": "CONSOLE",
            "name": "Interactive Console",
            "panel": "bottom",
            "foldername": "interactiveConsole",
            "enabled": true,
            "nodeCompliant": true
        },
        {
            "id": "UWP",
            "name": "UWP apps",
            "panel": "top",
            "foldername": "uwp",
            "enabled": false
        },
        {
            "id": "NGINSPECTOR",
            "name": "Ng. Inspector",
            "panel": "top",
            "foldername": "ngInspector",
            "enabled": false
        },
        {
            "id": "OFFICE",
            "name": "Office Addin",
            "panel": "top",
            "foldername": "office",
            "enabled": true
        },
        {
            "id": "MODERNIZR",
            "name": "Modernizr",
            "panel": "bottom",
            "foldername": "modernizrReport",
            "enabled": true
        },
        {
            "id": "DOMTIMELINE",
            "name": "Dom timeline",
            "panel": "top",
            "foldername": "domtimeline",
            "enabled": false,
            "nodeCompliant": false,
            "nodeOnly": false
        }
    ]
}
Windows環境でVorlon.JSをインストールした場合、config.jsonファイルは下記場所にありました。
%APPDATA%\npm\node_modules\vorlon\Server
Vorlon.JSの起動と証明書エラーの対応
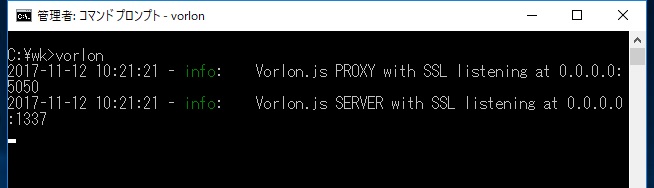
設定後、コマンドプロンプトから下記コマンドを実行すると、Vorlon.JSを起動できます。
vorlon
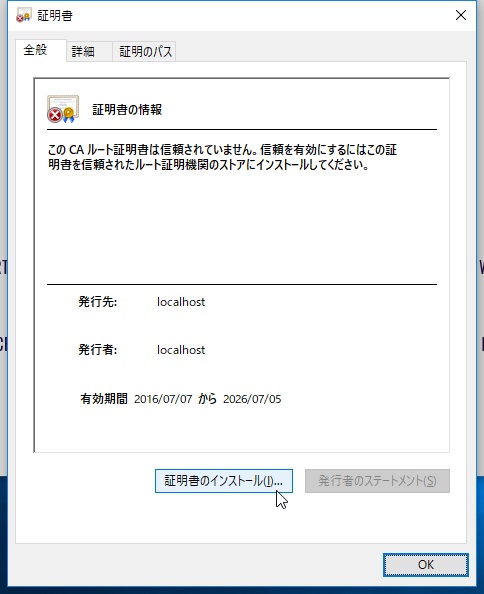
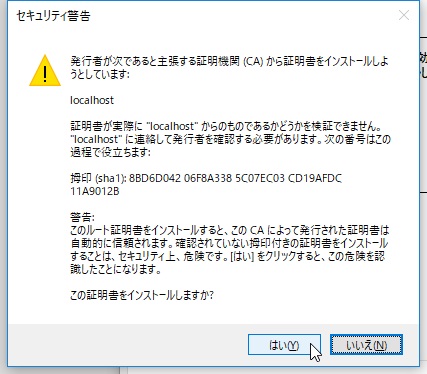
この状態でブラウザーから「https://localhost:1337/」にアクセスすると、Vorlon.JSのダッシュボード画面が表示されるのですが、環境によっては下図のように証明書エラーが表示されます。
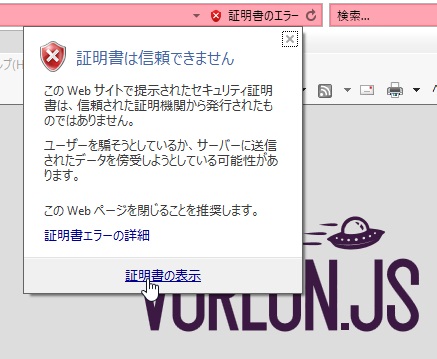
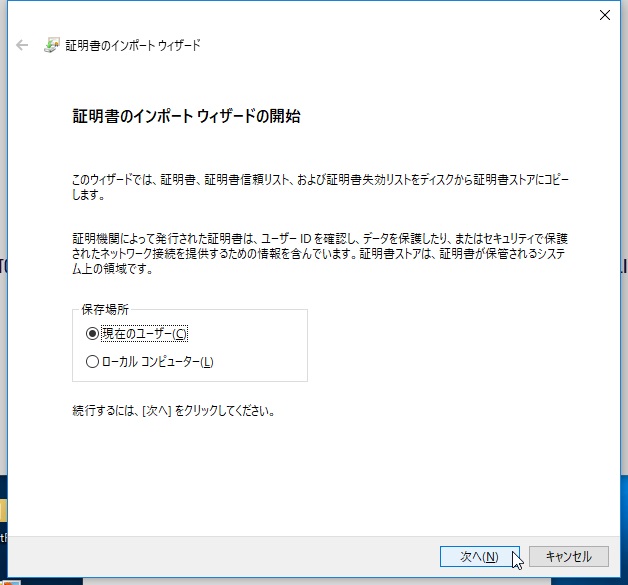
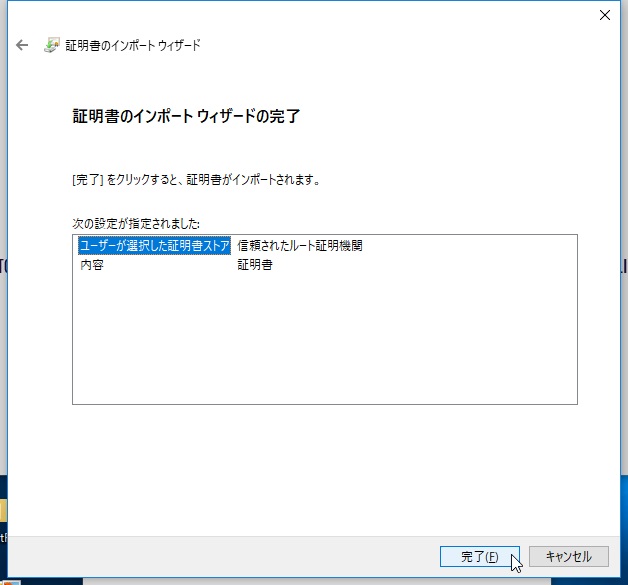
その場合は、証明書を「信頼されたルート証明機関」にインポートすることで、エラーを非表示にすることができます。

Vorlon.JSの読み込み
準備ができたので、次はいよいよVorlon.JSを使ってCustom functionsのデバッグを行います。
マニフェストファイル(manifest.xml)
<?xml version="1.0" encoding="utf-8"?>
<OfficeApp xmlns="http://schemas.microsoft.com/office/appforoffice/1.1" xmlns:xsi="http://www.w3.org/2001/XMLSchema-instance" xmlns:bt="http://schemas.microsoft.com/office/officeappbasictypes/1.0" xmlns:ov="http://schemas.microsoft.com/office/taskpaneappversionoverrides" xsi:type="TaskPaneApp">
  <Id>137f411d-732a-4ff5-8d9e-5438488f9539</Id>
  <Version>1.0.0.0</Version>
  <ProviderName>kinuasa</ProviderName>
  <DefaultLocale>ja-JP</DefaultLocale>
  <DisplayName DefaultValue="Custom functions sample" />
  <Description DefaultValue="Custom functionsのサンプルアドインです。" />
  <Hosts>
    <Host Name="Workbook" />
  </Hosts>
  <DefaultSettings>
    <SourceLocation DefaultValue="https://localhost:1337/customfunctions/customfunctions.html"/>
  </DefaultSettings>
  <Permissions>ReadWriteDocument</Permissions>
  <VersionOverrides xmlns="http://schemas.microsoft.com/office/taskpaneappversionoverrides" xsi:type="VersionOverridesV1_0">
    <Hosts>
      <Host xsi:type="Workbook">
        <AllFormFactors>
          <ExtensionPoint xsi:type="CustomFunctions">
            <Script>
              <SourceLocation resid="functionsjs" />
            </Script>
            <Page>
              <SourceLocation resid="functionshtml"/>
            </Page>
          </ExtensionPoint>
        </AllFormFactors>
      </Host>
    </Hosts>
    <Resources>
      <bt:Urls>
      	<bt:Url id="functionsjs" DefaultValue="https://localhost:1337/customfunctions/customfunctions.js" />
      	<bt:Url id="functionshtml" DefaultValue="https://localhost:1337/customfunctions/customfunctions.html" />
      </bt:Urls>
    </Resources>
  </VersionOverrides>
</OfficeApp>
アドイン本体(customfunctions.html)
<!DOCTYPE html>
<html>
<head>
  <meta charset="UTF-8" />
  <meta http-equiv="X-UA-Compatible" content="IE=Edge" />
  <meta http-equiv="Expires" content="0" />
  <title>Custom functions sample</title>
  <!-- <script src="https://appsforoffice.microsoft.com/lib/1/hosted/office.js"></script> -->
  <!-- <script src="https://appsforoffice.microsoft.com/lib/beta/hosted/office.js"></script> -->
  <script src="https://appsforoffice.edog.officeapps.live.com/lib/beta/hosted/office.js"></script>
  <script src="https://localhost:1337/vorlon.js"></script>
  <script src="customfunctions.js"></script>
</head>
<body></body>
</html>
JavaScriptファイル(customfunctions.js)
Office.initialize = function(reason){
    Excel.Script.CustomFunctions = {};
    Excel.Script.CustomFunctions["CONTOSO"] = {};

    function add100 (a, b) {
        console.log("Num1:" + a + ", Num2:" + b);
        return a + b + 100;
    }

    Excel.Script.CustomFunctions["CONTOSO"]["ADD100"] = {
        call: add100,
        description: "2つの数値に100を足した値を返します。",
        helpUrl: "https://localhost:1337/help.html",
        result: {
            resultType: Excel.CustomFunctionValueType.number,
            resultDimensionality: Excel.CustomFunctionDimensionality.scalar,
        },
        parameters: [
            {
                name: "num 1",
                description: "最初の数値",
                valueType: Excel.CustomFunctionValueType.number,
                valueDimensionality: Excel.CustomFunctionDimensionality.scalar,
            },
            {
                name: "num 2",
                description: "2番目の数値",
                valueType: Excel.CustomFunctionValueType.number,
                valueDimensionality: Excel.CustomFunctionDimensionality.scalar,
            }
        ],
        options:{ batch: false, stream: false }
    };

    Excel.run(function (context) {
        context.workbook.customFunctions.addAll();
        return context.sync().then(function(){});
    }).catch(function(error){});
};
前回の記事とほぼ同じコードですが、本体のscript要素でvorlon.jsを読み込んでいる点と、呼び出す関数内でconsole.logしている点が異なります。
(ちなみに、マニフェストファイルを見れば分かる通り、本体とJavaScriptファイルはVorlon.JSのサーバー配下に移動させています。)
Custom functionsのデバッグ
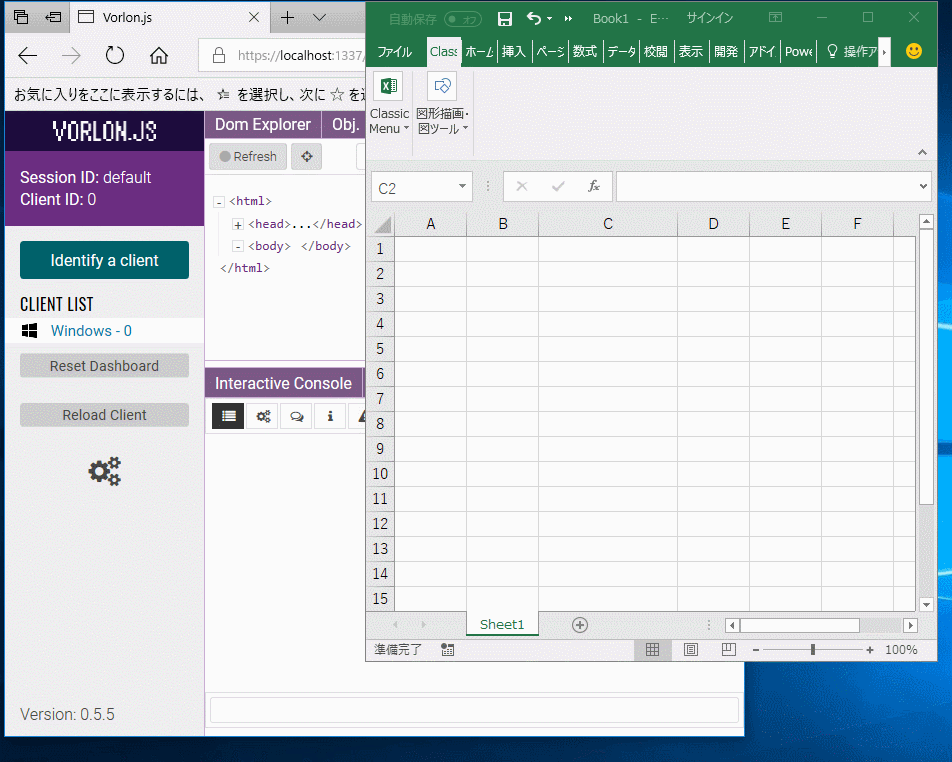
Vorlon.JSを起動した状態で、Custom functionsの機能を呼び出すと、Vorlon.JSのInteractive Consoleパネルに関数内の値がコンソール出力されます。
正直、使い勝手としてはF12開発者ツールの方が良いのですが、背に腹はかえられず・・・。
何も手がかりなく試行錯誤するよりはずっと開発が楽になりますので、Custom functionsのデバッグでお困りの方は、一度Vorlon.JSを試してみてはいかがでしょうか?


この記事へのコメントはありません。